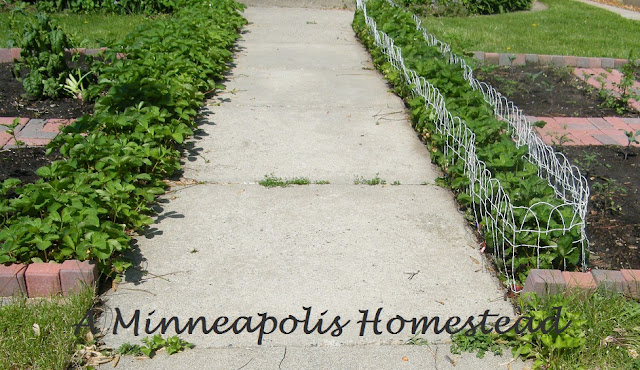
Our Plan to Protect Our Strawberries From Critters That Still Looks Pretty
By JULIE - 12:41:00 PM
We first planted our strawberries last year. We only planted on a foot, probably about 24 plants. We didn't harvest much last year because most of the squirrels and birds got to what little harvest we had before we got to it. Since then our strawberry plants have created many runners and filled every space we let them. This year we actually could have a decent crop...if the critters don't get to it first. Since we mostly have June bearing strawberries (about 1/4 of ours are ever bearing) they started to ripen about 2 weeks ago. The critters realized this before we did. Since then we've been finding about 2-3 half eaten strawberries on our sidewalk a day.
Last fall we came up with our plan to protect our strawberries and even bought our supplies on clearance last fall. The only bad thing about that is the wire border we bought was coated in PVC. Which is a bummer because as I posted before we are trying to get obesogens, chemicals that mimic estrogen, out of our garden. PVC has Phthalates in it, which is a chemical hormone mimicker. You can read more about this in my previous posts. Since we already bought the materials and needed to put it up quickly, we decided to go with it anyways. I would try to find non PVC coated wire for this project if possible as a precaution. I would also try this in early spring if possible. It was difficult putting this in trying not to harm or growing strawberries.
Materials Needed
I harvested our strawberries for the first time since installing our protection it took me about 2 hrs to harvest (I am harvesting every 3 days) and I harvested over 3 lbs (pictured below). It did take me longer to harvest, but I think it's worth it since we will have only one large harvest this year and we have already harvested about 5lbs.
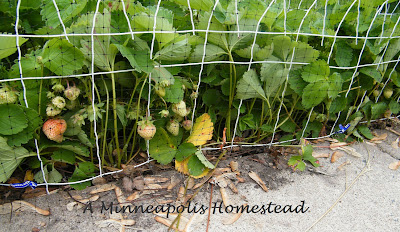
In order to harvest I took of the twist ties off one side only and retied it after harvesting, so make sure not to go to crazy twist tying because it will be harder to harvest! I did notice two half eaten strawberries that were under protection by our bird netting. Did a bird peck through it? Insects? I don't know. This might not be a full proof plan (a critter may still get at a few a season) but I think it will at least save our harvest from critters, and is still easy enough to harvest, looks attractive, and an added bonus is the structure helps to support the strawberries. How do you protect your strawberries? As always I'd love to hear your thoughts and ideas.
Last fall we came up with our plan to protect our strawberries and even bought our supplies on clearance last fall. The only bad thing about that is the wire border we bought was coated in PVC. Which is a bummer because as I posted before we are trying to get obesogens, chemicals that mimic estrogen, out of our garden. PVC has Phthalates in it, which is a chemical hormone mimicker. You can read more about this in my previous posts. Since we already bought the materials and needed to put it up quickly, we decided to go with it anyways. I would try to find non PVC coated wire for this project if possible as a precaution. I would also try this in early spring if possible. It was difficult putting this in trying not to harm or growing strawberries.
 |
| This is what our strawberry patch look like half done |
- Wire border or structure (with no PVC coating see above)
- thin wire for connecting the boarder (we used the wire in our package to keep the border together
- lots of twist ties
- enough bird netting to cover your space (make sure to have extra as fudge room)
- Straighten the wire first and than anchor the opposite end that you are working on.
- Position the wire to go into the dirt and then pressed it down into the soil
- Attach thin wire to bring the end pieces of the wire border together
- I then used bird netting to cover the wire boarder. Use twist ties every 4 sections to tie the netting to the border on one side, and then draped it over to see how much is needed and where to cut.
- Cut the netting to make sure to have enough in case you judge wrong.
- Then tie the other side down as pictured below.
- If your netting is not long enough you can just over lap it, which I found to actually make harvesting easier
 |
| our bird netting tied to the wire boarder |
 |
| Our Strawberry harvest we are currently getting twice a week |


0 comments